
This site uses cookies. By continuing to browse the site you are agreeing to our use of cookies.
How To Load Google Fonts Locally In WordPress
If your WordPress site has Google Fonts errors in GTmetrix, Pingdom and Google PageSpeed Insights, you may need to load the Google Fonts locally on your WordPress Theme in order to fix it.
Unfortunately, we can not control and optimise external resources such as Google fonts and other scripts, which makes it impossible to compress and minify. This definitely it will seriously affect your WordPress website speed. If you are already configured a cache plugin like WP Rocket or WP-Cache, you may start noticing external resources like fonts affecting GTmetrix, Pingdom and Google PageSpeed Insights loading times. This is where loading Google Fonts locally comes into play. This allows your cache plugin to compress all resources related to your custom font(s).
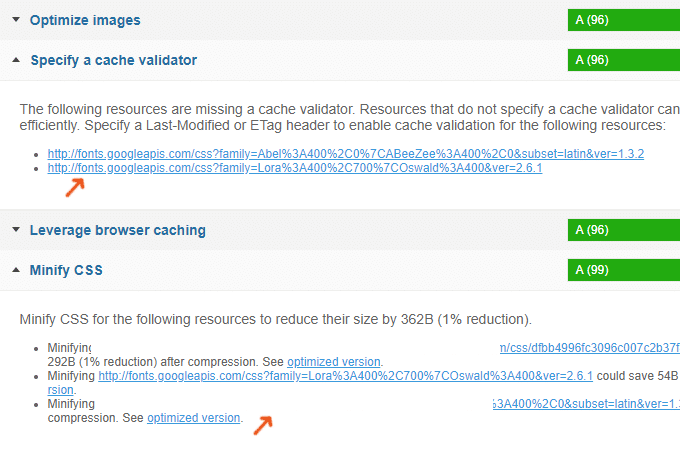
Table Of Contents
- Choose a Google Font
- Download The Font
- Convert Fonts to Web Fonts
- Download Converted Font Files
- Upload Font Files To WordPress Files
- Add Custom Font To CSS
- Test The Font
- Set The Default Font
- Always Have Font Fallbacks
- Retest Your Website (In GTmetrix)
Step 1: Choose A Google Font
In this example, we will use Roboto font with two font weights: regular (400) and bold (700).
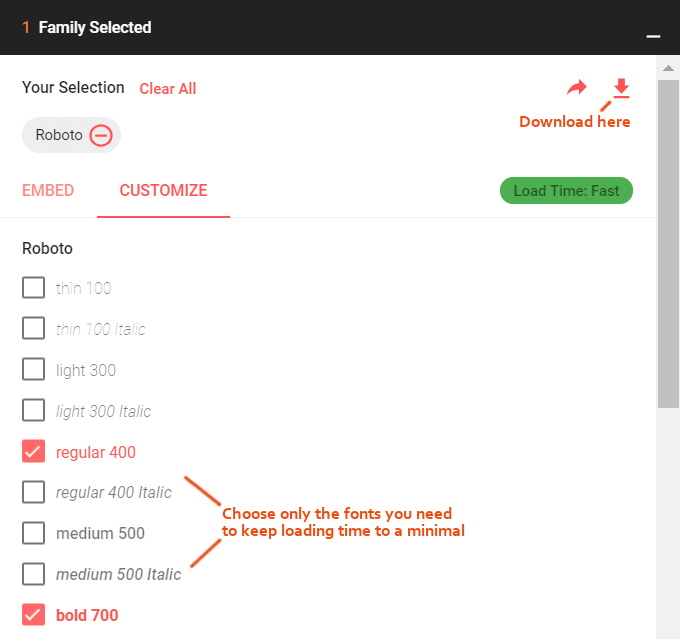
Use Fewer Google Fonts – keep your Google Fonts to a minimum (less fonts = less requests).
Be Selective With Font Weights – the number of weights also affect load times. If you only need the bold version, uncheck the other weights so Google Fonts only load those you need.
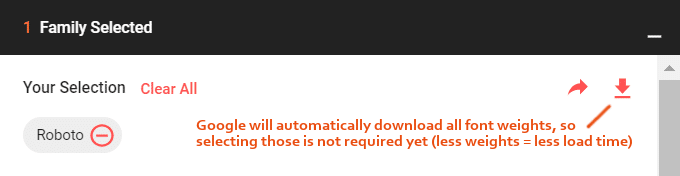
Step 2: Download The Font
Download the fonts when you’re ready. Google will automatically download all font weights, so the selection of font weights is not required at this step and is instead required in step 3.
Step 3: Convert Fonts To Web Fonts
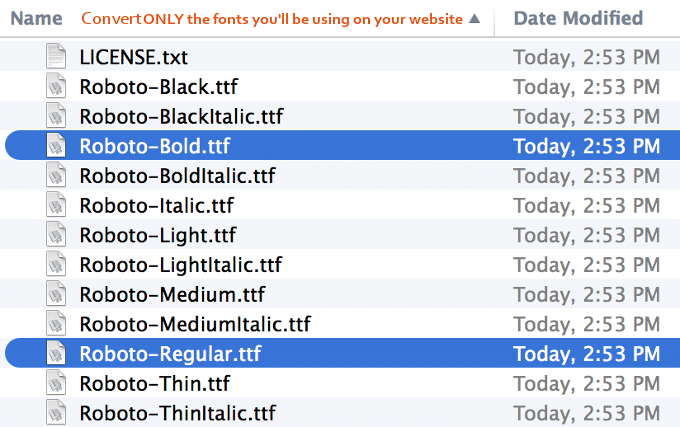
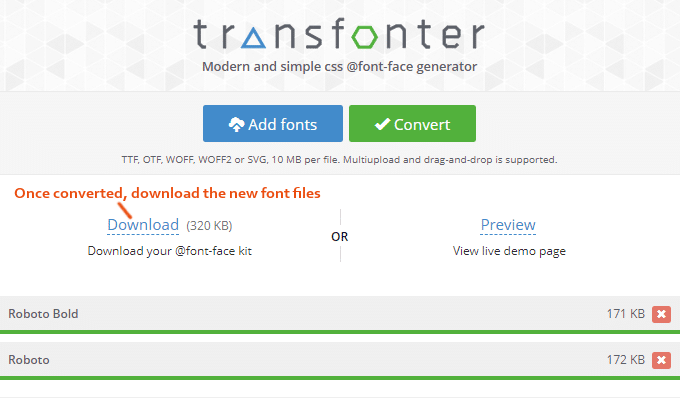
Next, we’ll convert these font files (.ttf) to web font files. I’ll be using Transfonter. Go to their site, click Add Fonts, then upload only the font types you’ll be using on your website. I’m using Roboto-Regular.ttf and Roboto-Bold.ttf so I have both regular and bold weights. Leave the settings as default since WOFF and WOFF2 cover all major browsers. Now click convert.
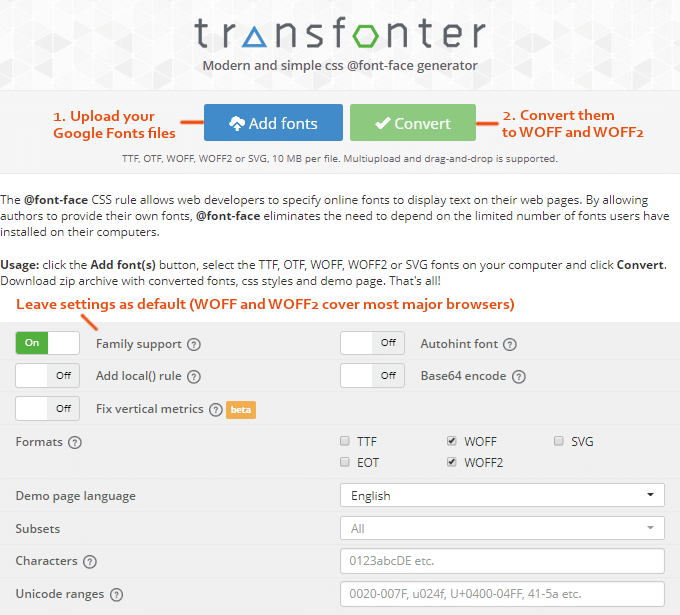
Only select the font types you’ll be using on your website.
Step 4: Download Converted Font Files
Once the fonts are converted, you can download them. In the zip file, each font will include WOFF and WOFF2 formats (since we downloaded 2 fonts, we will have a total of 4 font files).
Step 5: Upload Font Files To WordPress Files
Upload the web font files via your Control Version(GitHub, bitbucket) SFTP or any other method you are using to upload your theme changes. I created a “fonts” folder inside your theme and uploaded them there.
Example:
- http://yourwebsite.com/wp-content/themes/yourtheme/fonts/Roboto-Regular.woff
- http://yourwebsite.com/wp-content/themes/yourtheme/fonts/Roboto-Regular.woff2
- http://yourwebsite.com/wp-content/themes/yourtheme/fonts/Roboto-Bold.woff
- http://yourwebsite.com/wp-content/themes/yourtheme/fonts/Roboto-Bold.woff2
NOTE: replace yourwebsite.com with your own website and your yourtheme.
Step 6: Add Custom Font To CSS
Next, we will add the CSS you got inside the downloaded zip file named stylesheet.css. This is the CSS code that will connect your fonts with your existing CSS and make them ready to use.
Where to place the CSS code is subjective but you can use an external stylesheet or the WordPress’ wp_enqueue_style function in functions.php, or at the start of your style.css file (or custom.css if you have one). I’m going to paste it in the default style.css file of the theme. Copy/paste the code into the stylesheet and change any relative URLs to absolute URLs.
@font-face {
    font-family: 'Lekton';
    src: url('../fonts/Lekton/Lekton-Bold.woff2') format('woff2'),
        url('../fonts/Lekton/Lekton-Bold.woff') format('woff');
    font-weight: bold;
    font-style: normal;
}

@font-face {
    font-family: 'Lekton';
    src: url('../fonts/Lekton/Lekton-Regular.woff2') format('woff2'),
        url('../fonts/Lekton/Lekton-Regular.woff') format('woff');
    font-weight: normal;
    font-style: normal;
}

@font-face {
    font-family: 'Lekton';
    src: url('../fonts/Lekton/Lekton-Italic.woff2') format('woff2'),
        url('../fonts/Lekton/Lekton-Italic.woff') format('woff');
    font-weight: normal;
    font-style: italic;
}
Step 7: Test The Font
Now create a test page and place the following code in the Text Editor.
<h2>Testing</h2>
<h2 class="roboto_font"> Custom Font Test </h2>
<h2 class="roboto_bold_font"> Custom Font Test </h2>
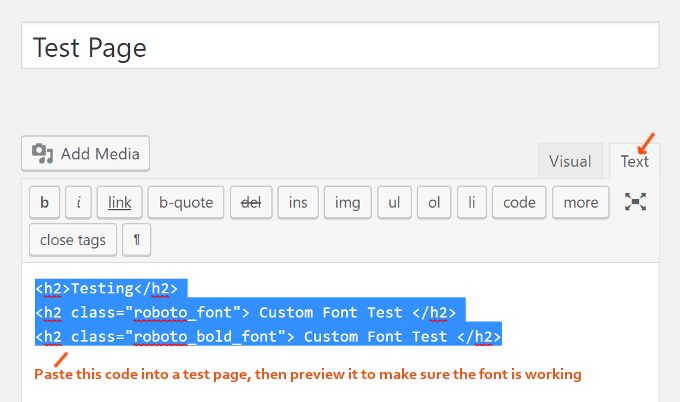
Preview the page. If you did it correctly, you should see the new custom font! The first heading is the default font of your website, the second and third are the Google Fonts fonts we added:

Step 8: Set The Default Font
To make this your website’s default font, add this CSS to your style.css file:
body {
  font-family: "Roboto", "Arial", sans-serif;
}
Now, in case it fails to load your Google Fonts, the browser will fall back to Arial font or the default sans-serif font type of the system and not cause any issues with the font rendering.
Retest Your Website (In GTmetrix)
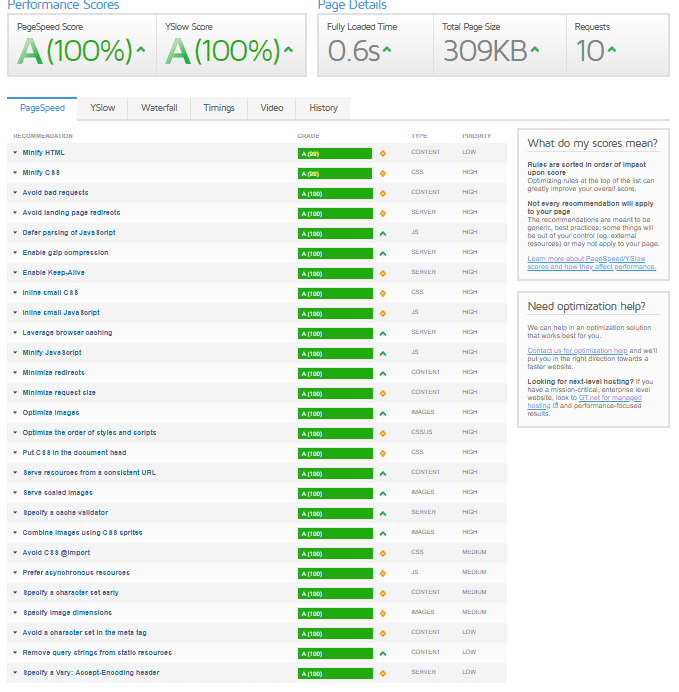
You shouldn’t see any Google Fonts errors in it.
Have questions? Drop me a line.