This site uses cookies. By continuing to browse the site you are agreeing to our use of cookies.
Install WordPress on Ubuntu 20.04
PREREQUISITES:
In order to follow this guide, you should have a server with Ubuntu 20.04 (LTS) installed with 1GB minimal memory and 10GB minimal hard drive and access to sudo privileges.
Step 1: Update Ubuntu Ubuntu 20.04 (LTS)
Before we install any software, it’s always a good idea to update repository and software packages. SSH into your Ubuntu 20.04 (LTS) server and enter the below commands.
sudo apt update
sudo apt upgrade
Step 2: Install Nginx Web Server
Nginx is a high performance web server. It also can be used as a reverse proxy. Enter this command to install Nginx Web server.
sudo apt install nginx
After it’s installed, we can enable Nginx to auto-start when Ubuntu is booted by running the following command.
sudo systemctl enable nginx
Then start Nginx with this command:
sudo systemctl start nginx
Now check out its status.
systemctl status nginx
Step 3: Install MariaDB
MariaDB is a drop-in replacement for MySQL. It is developed by former members of MySQL team who concerned that Oracle might turn MySQL into a closed-source product. Many Linux distributions (Arch Linux, Fedora etc), companies and organizations (Google, Wikipedia) have migrated to MariaDB. So we’re going to install MariaDB instead of MySQL.
sudo apt install mariadb-server mariadb-client
To enable MariaDB to automatically start when Ubuntu is rebooted:
sudo systemctl disable mysql.service
sudo systemctl enable mysql.service
After it’s enabled, use systemctl to check its status.
sudo systemctl status mysql.service
If it’s not running, start it with this command:
sudo systemctl start mysql.service
Now run the post-installation security script.
sudo mysql_secure_installation
When it asks you to enter MariaDB root password, press enter because you have not set the root password yet. Then enter y to set the root password for MariaDB server. Next you can just press Enter to answer all the remaining questions. This will remove anonymous user, disable remote root login and remove test database. This step is a basic requirement for MariaDB database security.
Step 4: Create database for WordPress website
Change database name and user and remember to change the password to a secure one 🙂
mysql -u root -p

CREATE DATABASE nunosarmento DEFAULT CHARACTER SET utf8 COLLATE utf8_unicode_ci;

GRANT ALL ON nunosarmento.* TO 'nunosarmentouser'@'localhost' IDENTIFIED BY 'ypourpassword';

FLUSH PRIVILEGES;

EXIT;
Step 5: Install and Setup PHP 8.1
Enter the following commands to install repo, PHP 8.1 and PHP8 extensions.
PHP 8.1 instalation
sudo apt install software-properties-common

sudo add-apt-repository ppa:ondrej/php -y

sudo apt update

sudo apt install php8.1-fpm php8.1-common php8.1-mysql php8.1-xml php8.1-xmlrpc php8.1-curl php8.1-gd php8.1-imagick php8.1-cli php8.1-dev php8.1-imap php8.1-mbstring php8.1-opcache php8.1-soap php8.1-zip php8.1-redis php8.1-intl -y
After the installation has completed, confirm that PHP 8.1 has installed correctly with this command
php-fpm8.1 -v
Now that PHP 8.1 has installed and you need to configure the user and group that the service will run under.
sudo nano /etc/php/8.1/fpm/pool.d/www.conf

user = www-data
group = www-data
listen.owner = www-data
listen.group = www-data
Configure PHP for WordPress by changing some values in php.ini.
sudo nano /etc/php/8.1/fpm/php.ini

file_uploads = On
allow_url_fopen = On
upload_max_filesize = 100M
post_max_size = 100M
memory_limit = 256M
max_execution_time = 360
max_input_vars = 3000
max_input_time = 1000
Reload php8.1-fpm.
sudo systemctl reload php8.1-fpm
Check status:
systemctl status php8.1-fpm
To test the CLI version of PHP, we just need to enter this command:
php --version
Sample output:

Step 6: Create Nginx Virtual Host
Create Nginx conf file (change the domain name to your domain name)
sudo nano /etc/nginx/sites-available/nuno-sarmento.com/
Paste the following text into the file. Replace “server_name” with your actual domain name.
server{

        listen 80;
        listen [::]:80;
        server_name nuno-sarmento.com/ www.nuno-sarmento.com/;

        root /var/www/nuno-sarmento.com/;
        index index.php;

        # log files
        access_log /var/log/nginx/nuno-sarmento.com/.access.log;
        error_log /var/log/nginx/nuno-sarmento.com/.error.log;

        location / {
           try_files $uri $uri/ /index.php?$args;
        }

        location ~ \.php$ {
                include snippets/fastcgi-php.conf;
                fastcgi_pass unix:/var/run/php/php8.1-fpm.sock;
        }

}
Save and close the file. Then create syslink to nginx sites-enable conf directory.
sudo ln -s /etc/nginx/sites-available/nuno-sarmento.com/ /etc/nginx/sites-enabled/
Create your virtual host website directory
sudo mkdir /var/www/nuno-sarmento.com/
Set permissions to the virtual host directory
sudo chown -R www-data:www-data /var/www/nuno-sarmento.com/
Check if your Nginx changes don’t have errors
sudo nginx -t
sudo systemctl reload nginx
Step 7: Install WordPress
cd /tmp/

curl -LO https://wordpress.org/latest.tar.gz

tar xzvf latest.tar.gz

cp /tmp/wordpress/wp-config-sample.php /tmp/wordpress/wp-config.php

sudo cp -a /tmp/wordpress/. /var/www/nuno-sarmento.com/

sudo chown -R www-data:www-data /var/www/nuno-sarmento.com/*

cd /var/www/nuno-sarmento.com/

find -type d -exec chmod 755 {} \;
find -type f -exec chmod 644 {} \;

chown -R www-data:www-data *
Edit the WordPress wp-config.php with the details from step 4 “Create database for WordPress website”
nano /var/www/nuno-sarmento.com/wp-config.php
NOTE – you will need also to create the WordPress Salt Keys https://api.wordpress.org/secret-key/1.1/salt/ and added manually to your wp-config.php
Step 8: Harden Nginx/WordPress
In order to secure/harden your WordPress you will need to add some nginx rules. The URL below has a mix of security, cache and others that will make your Nginx/WordPress setup more secure and doable. Copy the nginx rules from the gist below and add it to your wordpress.conf.
Gist: https://gist.github.com/57db5abba08b315b67f174cd178bea88
cd /etc/nginx/
mkdir common
cd common
nano wordpress.conf
Open you your virtual host conf file.
sudo nano /etc/nginx/sites-available/nuno-sarmento.com/
Add the below include to your VH conf file just below the log files setup.
include common/wordpress.conf;
server{

        listen 80;
        listen [::]:80;
        server_name nuno-sarmento.com/ www.nuno-sarmento.com/;

        root /var/www/nuno-sarmento.com/;
        index index.php;

        # log files
        access_log /var/log/nginx/nuno-sarmento.com/.access.log;
        error_log /var/log/nginx/nuno-sarmento.com/.error.log;

        # Nginx/WordPress security and other rules
        include common/wordpress.conf;

        location / {
           try_files $uri $uri/ /index.php?$args;
        }

        location ~ \.php$ {
                include snippets/fastcgi-php.conf;
                fastcgi_pass unix:/var/run/php/php8.1-fpm.sock;
        }

}
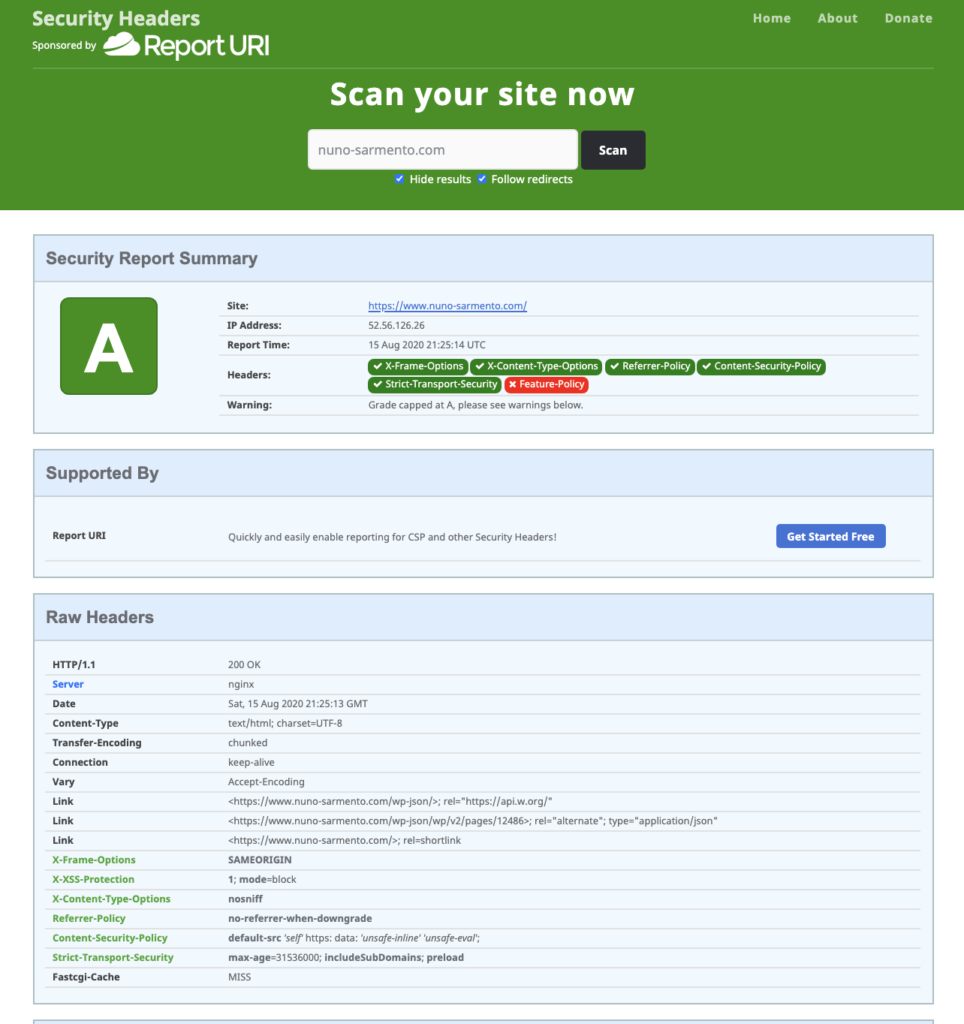
HTTP security headers
“HTTP security headers are a fundamental part of website security. Upon implementation, they protect you against the types of attacks that your site is most likely to come across. These headers protect against XSS, code injection, clickjacking, etc”
On this tutorial I won’t get into how HTTP security headers works or what is the best setup. The headers below are in use on my website and is suitable for most the WordPress setups.
If your nginx web server are running more than one website I recommend that you add the headers below on the nginx.conf right below the ssl_protocols
nano /etc/nginx/nginx.conf
add_header X-Frame-Options "SAMEORIGIN" always;
add_header X-XSS-Protection "1; mode=block" always;
add_header X-Content-Type-Options "nosniff" always;
add_header Referrer-Policy "no-referrer-when-downgrade" always;
add_header Content-Security-Policy "default-src 'self' https: data: 'unsafe-inline' 'unsafe-eval';" always;
add_header Strict-Transport-Security "max-age=31536000; includeSubDomains; preload" always;
You can check your websites headers security on the link below – please do it when you finish the tutorial:
https://securityheaders.com/
Step 9: Install Letsencrypt
sudo add-apt-repository ppa:certbot/certbot

if you are on Ubuntu 18:
sudo apt install python-certbot-nginx

if you are on Ubuntu 20:
sudo apt install python3-certbot-nginx

sudo certbot --nginx -d nuno-sarmento.com/ -d www.nuno-sarmento.com/
LetsEncrypt setps:
1 – Enter email address (used for urgent renewal and security notices) (Enter ‘c’ to
cancel): hello@nuno-sarmento.com/
– – – – – – – – – – – – – – – – – – – – – – – – – – – – – – – – – – – – – – – –
2 – Please read the Terms of Service at
https://letsencrypt.org/documents/LE-SA-v1.2-November-15-2017.pdf. You must
agree in order to register with the ACME server at
https://acme-v02.api.letsencrypt.org/directory
– – – – – – – – – – – – – – – – – – – – – – – – – – – – – – – – – – – – – – – –
(A)gree/(C)ancel: A
– – – – – – – – – – – – – – – – – – – – – – – – – – – – – – – – – – – – – – – –
3- Would you be willing to share your email address with the Electronic Frontier
Foundation, a founding partner of the Let’s Encrypt project and the non-profit
organization that develops Certbot? We’d like to send you email about our work
encrypting the web, EFF news, campaigns, and ways to support digital freedom.
– – – – – – – – – – – – – – – – – – – – – – – – – – – – – – – – – – – – – – – –
(Y)es/(N)o: Y
4 – Please choose whether or not to redirect HTTP traffic to HTTPS, removing HTTP access.
– – – – – – – – – – – – – – – – – – – – – – – – – – – – – – – – – – – – – – – –
1: No redirect – Make no further changes to the webserver configuration.
2: Redirect – Make all requests redirect to secure HTTPS access. Choose this for
new sites, or if you’re confident your site works on HTTPS. You can undo this
change by editing your web server’s configuration.
– – – – – – – – – – – – – – – – – – – – – – – – – – – – – – – – – – – – – – – –
Select the appropriate number [1-2] then [enter] (press ‘c’ to cancel): 2
Redirecting all traffic on port 80 to ssl in /etc/nginx/sites-enabled/nuno-sarmento.com/
Redirecting all traffic on port 80 to ssl in /etc/nginx/sites-enabled/nuno-sarmento.com/
– – – – – – – – – – – – – – – – – – – – – – – – – – – – – – – – – – – – – – – –
Congratulations! You have successfully enabled (https://nuno-sarmento.com) and
(https://www.nuno-sarmento.com/)
You should test your configuration at:
https://www.ssllabs.com/ssltest/analyze.html?d=nuno-sarmento.com/
https://www.ssllabs.com/ssltest/analyze.html?d=www.nuno-sarmento.com/
– – – – – – – – – – – – – – – – – – – – – – – – – – – – – – – – – – – – – – – –
Test your SSL configuration using the link below:
https://www.ssllabs.com/ssltest/
You probably won’t get “A+ Overall Rating”. By default nginx still has TLS 1.1 available and letsencrypt also includes this on their ssl configuration.
In order to get a A+ you should change your nginx SSL configuration accordingly. Mozilla has very cool tool that does that for you. https://ssl-config.mozilla.org/
TO RENEW YOUR SSL RUN THE BELOW COMMAND
sudo certbot renew
Step 10: Send WordPress (wp admin, woocommerce, forms, etc) emails
I use a light SMPT client MSMTP (https://marlam.de/msmtp/) that transmits all e-mails to an SMTP server which takes care of further delivery.
Requirements:
- gmail acccount
- enable gmail “Less secure app access” under gmail/account/security.
You can run this script https://gist.github.com/nfsarmento/4bb5e0ff3090f150c6696793cf8e8488 that I have created to this tutorial and it will install and setup MSMTP for you.
Test the configuration with the below code
echo -e "Subject: Test Mail\r\n\r\nThis is a test mail" | msmtp --debug --from=default -t test@nuno-sarmento.com --file=/etc/msmtprc
Congratulations you have successfully installed Nginx, MariaDB and PHP-8.1 on Ubuntu 20. You may also want to instal PHPMyAdmin on the server for managing MariaDB databases.
Reported issues
Error Nginx: 413 – Request Entity Too Large Error and Solution.
The error “413 – Request Entity Too Large” indicates that web server configured to restrict large file size. Nginx can be set to allow the maximum size of the client request body using client_max_body_size directive. If the size of a request exceeds the configured value, the 413 (Request Entity Too Large) error returned to the client. You will see an error as follows:
Nginx configuration
To fix this issue edit your nginx.conf. Open the Terminal or login to the remote server using ssh client. Type the following command to edit your nginx.conf.
sudo nano /etc/nginx/nginx.conf
Add the following line to http or server or location context to increase the size limit in nginx.conf, enter:
# set client body size to 10M #
client_max_body_size 10M;
Reload the nginx webserver, enter:
sudo nginx reload
Check the tutorial below for how to install phpMyAdmin with Nginx on Ubuntu 18.04 LTS